> ## Documentation Index
> Fetch the complete documentation index at: https://hoopdev-docs-improve-idp-sso-pages.mintlify.site/llms.txt
> Use this file to discover all available pages before exploring further.
# Okta
## Requirements
* An [account in OKTA](https://developer.okta.com)
* `API_URL` is the public DNS name of the hoop gateway instance
Contact the administrator of the hoop gateway instance to retrieve the `API_URL` address.
## Identity Provider Configuration
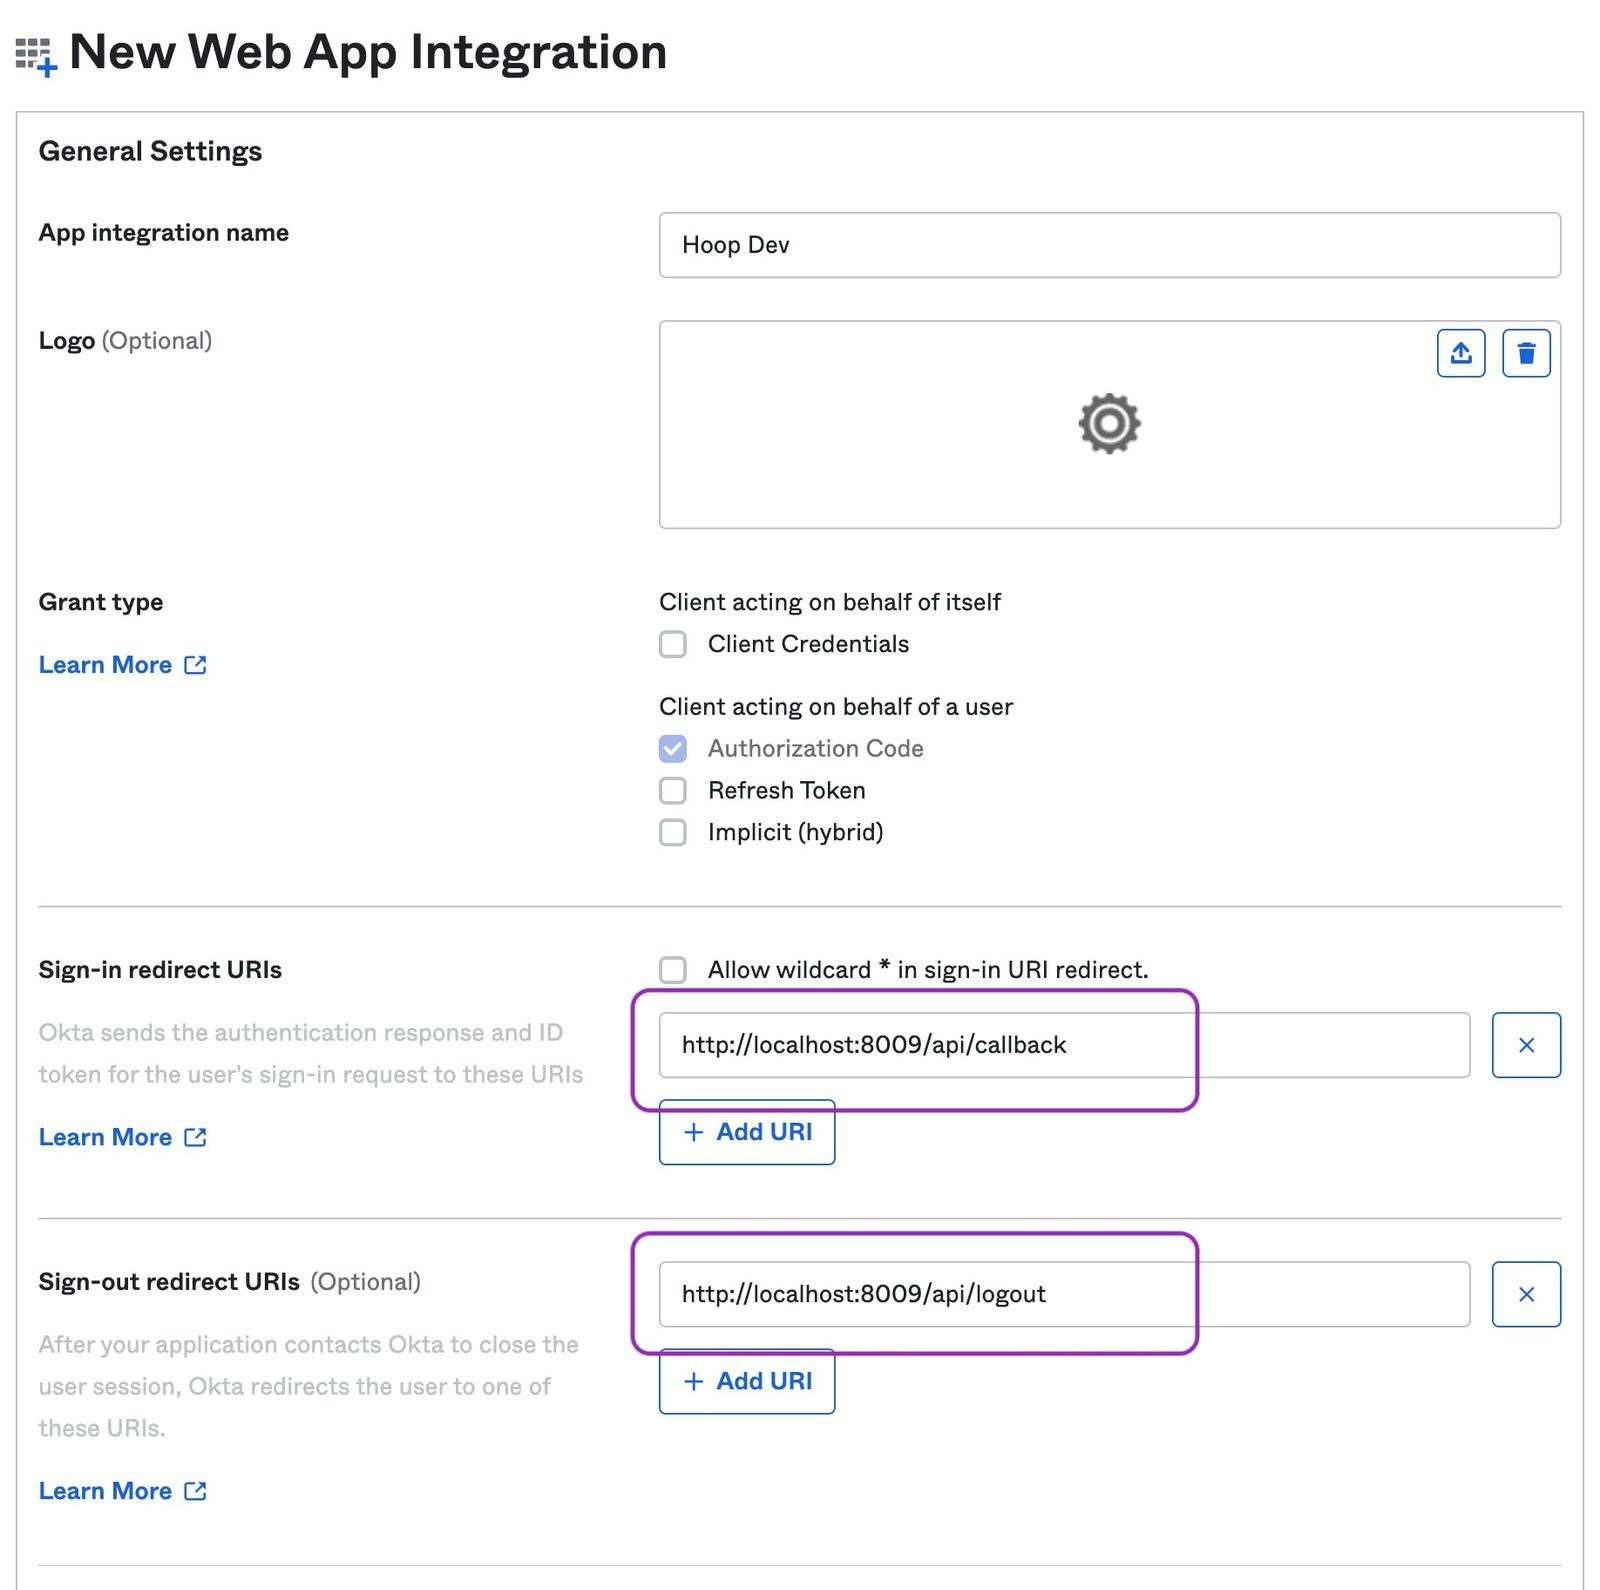
* Go to `Applications > Applications` and click on the Create App Integration button
* In Sign-in Method, select OIDC - OpenID Connect
* In Application type, select Web Application
* Signin redirect URIs: `{API_URL}/api/callback`
* Signout redirect URIs: `{API_URL}/api/logout`
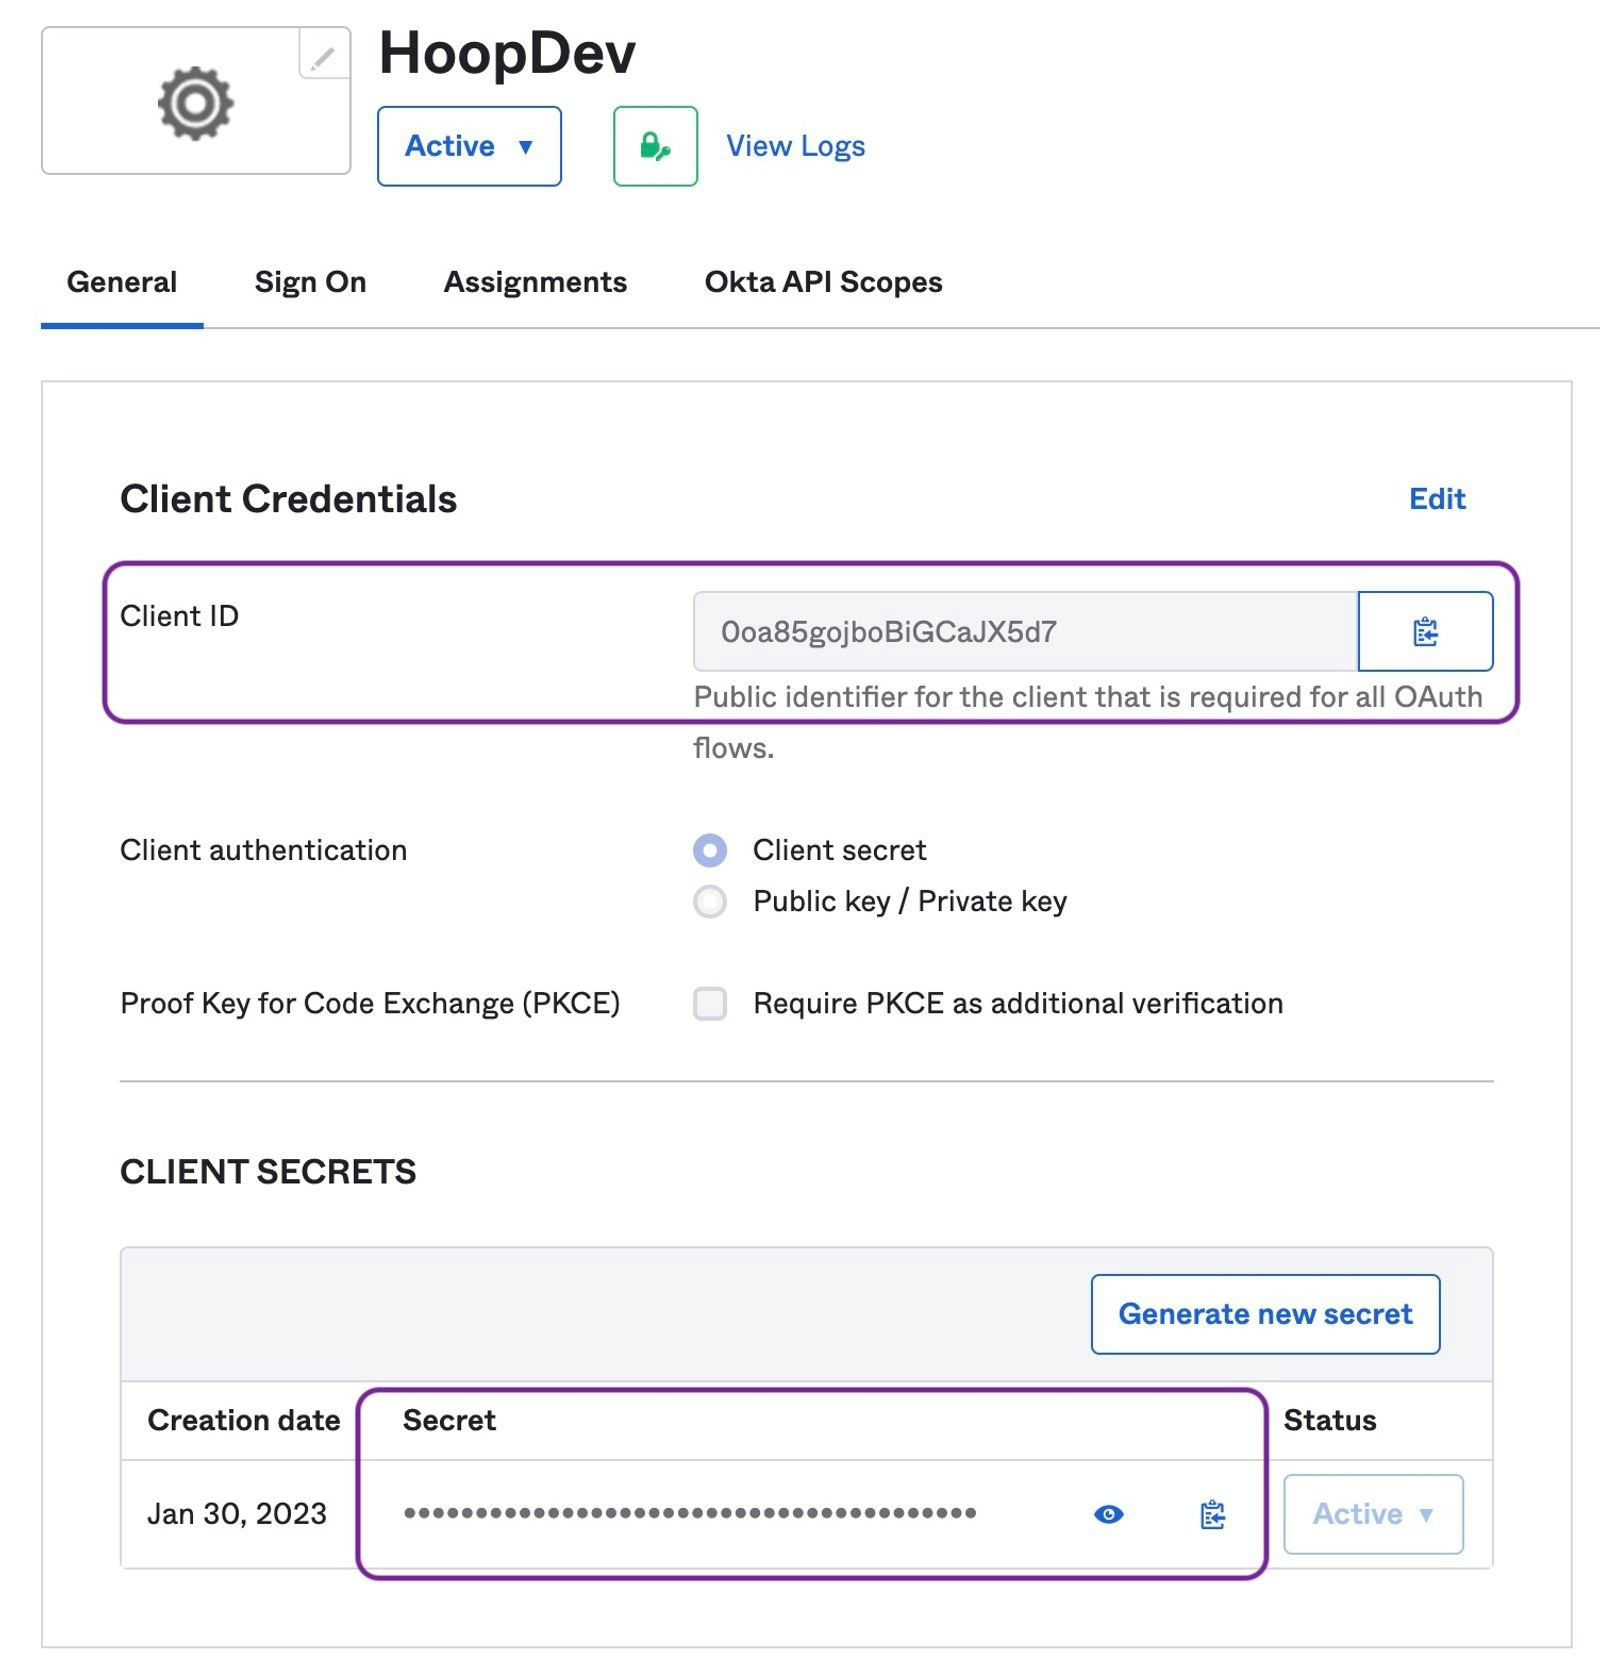
 * In the Application Home copy the **Client ID** and **Client Secret**
 * The Issuer URI depends on the authorization server being used. Refer to [this documentation](https://developer.okta.com/docs/concepts/auth-servers/#available-authorization-server-types).
If Okta does not allow external applications to validate access tokens, append `?_userinfo=1` to the Issuer URL (e.g., `https://your-org.okta.com/oauth2/default?_userinfo=1`). This tells the gateway to authenticate using the userinfo endpoint instead of validating the token directly.
## Configure Hoop Gateway
Go to **Integrations** > **Authentication** and fill in:
* **Auth Method**: OIDC
* **Issuer URL**: your Okta authorization server URI
* **Client ID**: the Client ID from above
* **Client Secret**: the Client Secret from above
* **Groups Claim**: `groups`
```sh theme={null}
curl -X PUT {API_URL}/api/serverconfig/auth \
-H "Api-Key: {API_KEY}" \
-H "Content-Type: application/json" \
-d '{
"auth_method": "oidc",
"provider_name": "okta",
"oidc_config": {
"issuer_url": "https://{YOUR_OKTA_DOMAIN}/oauth2/default",
"client_id": "{CLIENT_ID}",
"client_secret": "{CLIENT_SECRET}",
"groups_claim": "groups"
},
"webapp_users_management_status": "active"
}'
```
## Configuring Groups
Explains how to configure groups claim to propagate when users sign in.
Refer to [Okta's Documentation](https://developer.okta.com/docs/guides/customize-tokens-groups-claim/main/#add-a-groups-claim-for-the-org-authorization-server) for more information.
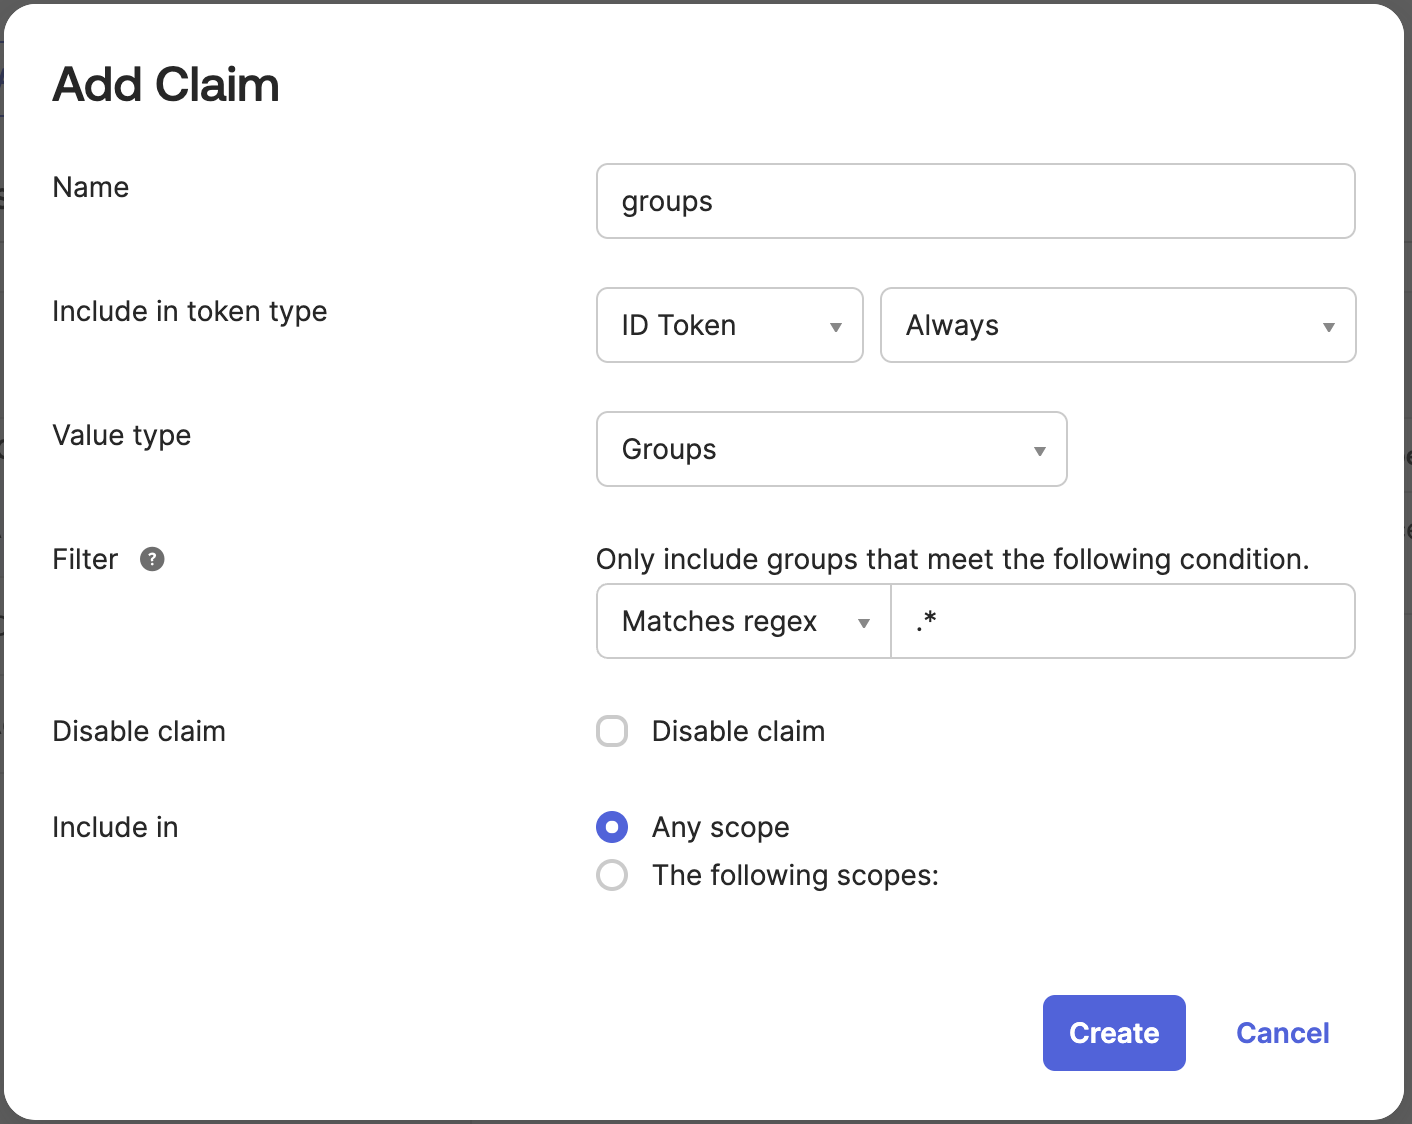
* Go to `Security > API > {authorization server} > Claims`
* Click on `Add Claims` button
Add the `groups` claim for the ID Token to any scope (image below)
* The Issuer URI depends on the authorization server being used. Refer to [this documentation](https://developer.okta.com/docs/concepts/auth-servers/#available-authorization-server-types).
If Okta does not allow external applications to validate access tokens, append `?_userinfo=1` to the Issuer URL (e.g., `https://your-org.okta.com/oauth2/default?_userinfo=1`). This tells the gateway to authenticate using the userinfo endpoint instead of validating the token directly.
## Configure Hoop Gateway
Go to **Integrations** > **Authentication** and fill in:
* **Auth Method**: OIDC
* **Issuer URL**: your Okta authorization server URI
* **Client ID**: the Client ID from above
* **Client Secret**: the Client Secret from above
* **Groups Claim**: `groups`
```sh theme={null}
curl -X PUT {API_URL}/api/serverconfig/auth \
-H "Api-Key: {API_KEY}" \
-H "Content-Type: application/json" \
-d '{
"auth_method": "oidc",
"provider_name": "okta",
"oidc_config": {
"issuer_url": "https://{YOUR_OKTA_DOMAIN}/oauth2/default",
"client_id": "{CLIENT_ID}",
"client_secret": "{CLIENT_SECRET}",
"groups_claim": "groups"
},
"webapp_users_management_status": "active"
}'
```
## Configuring Groups
Explains how to configure groups claim to propagate when users sign in.
Refer to [Okta's Documentation](https://developer.okta.com/docs/guides/customize-tokens-groups-claim/main/#add-a-groups-claim-for-the-org-authorization-server) for more information.
* Go to `Security > API > {authorization server} > Claims`
* Click on `Add Claims` button
Add the `groups` claim for the ID Token to any scope (image below)
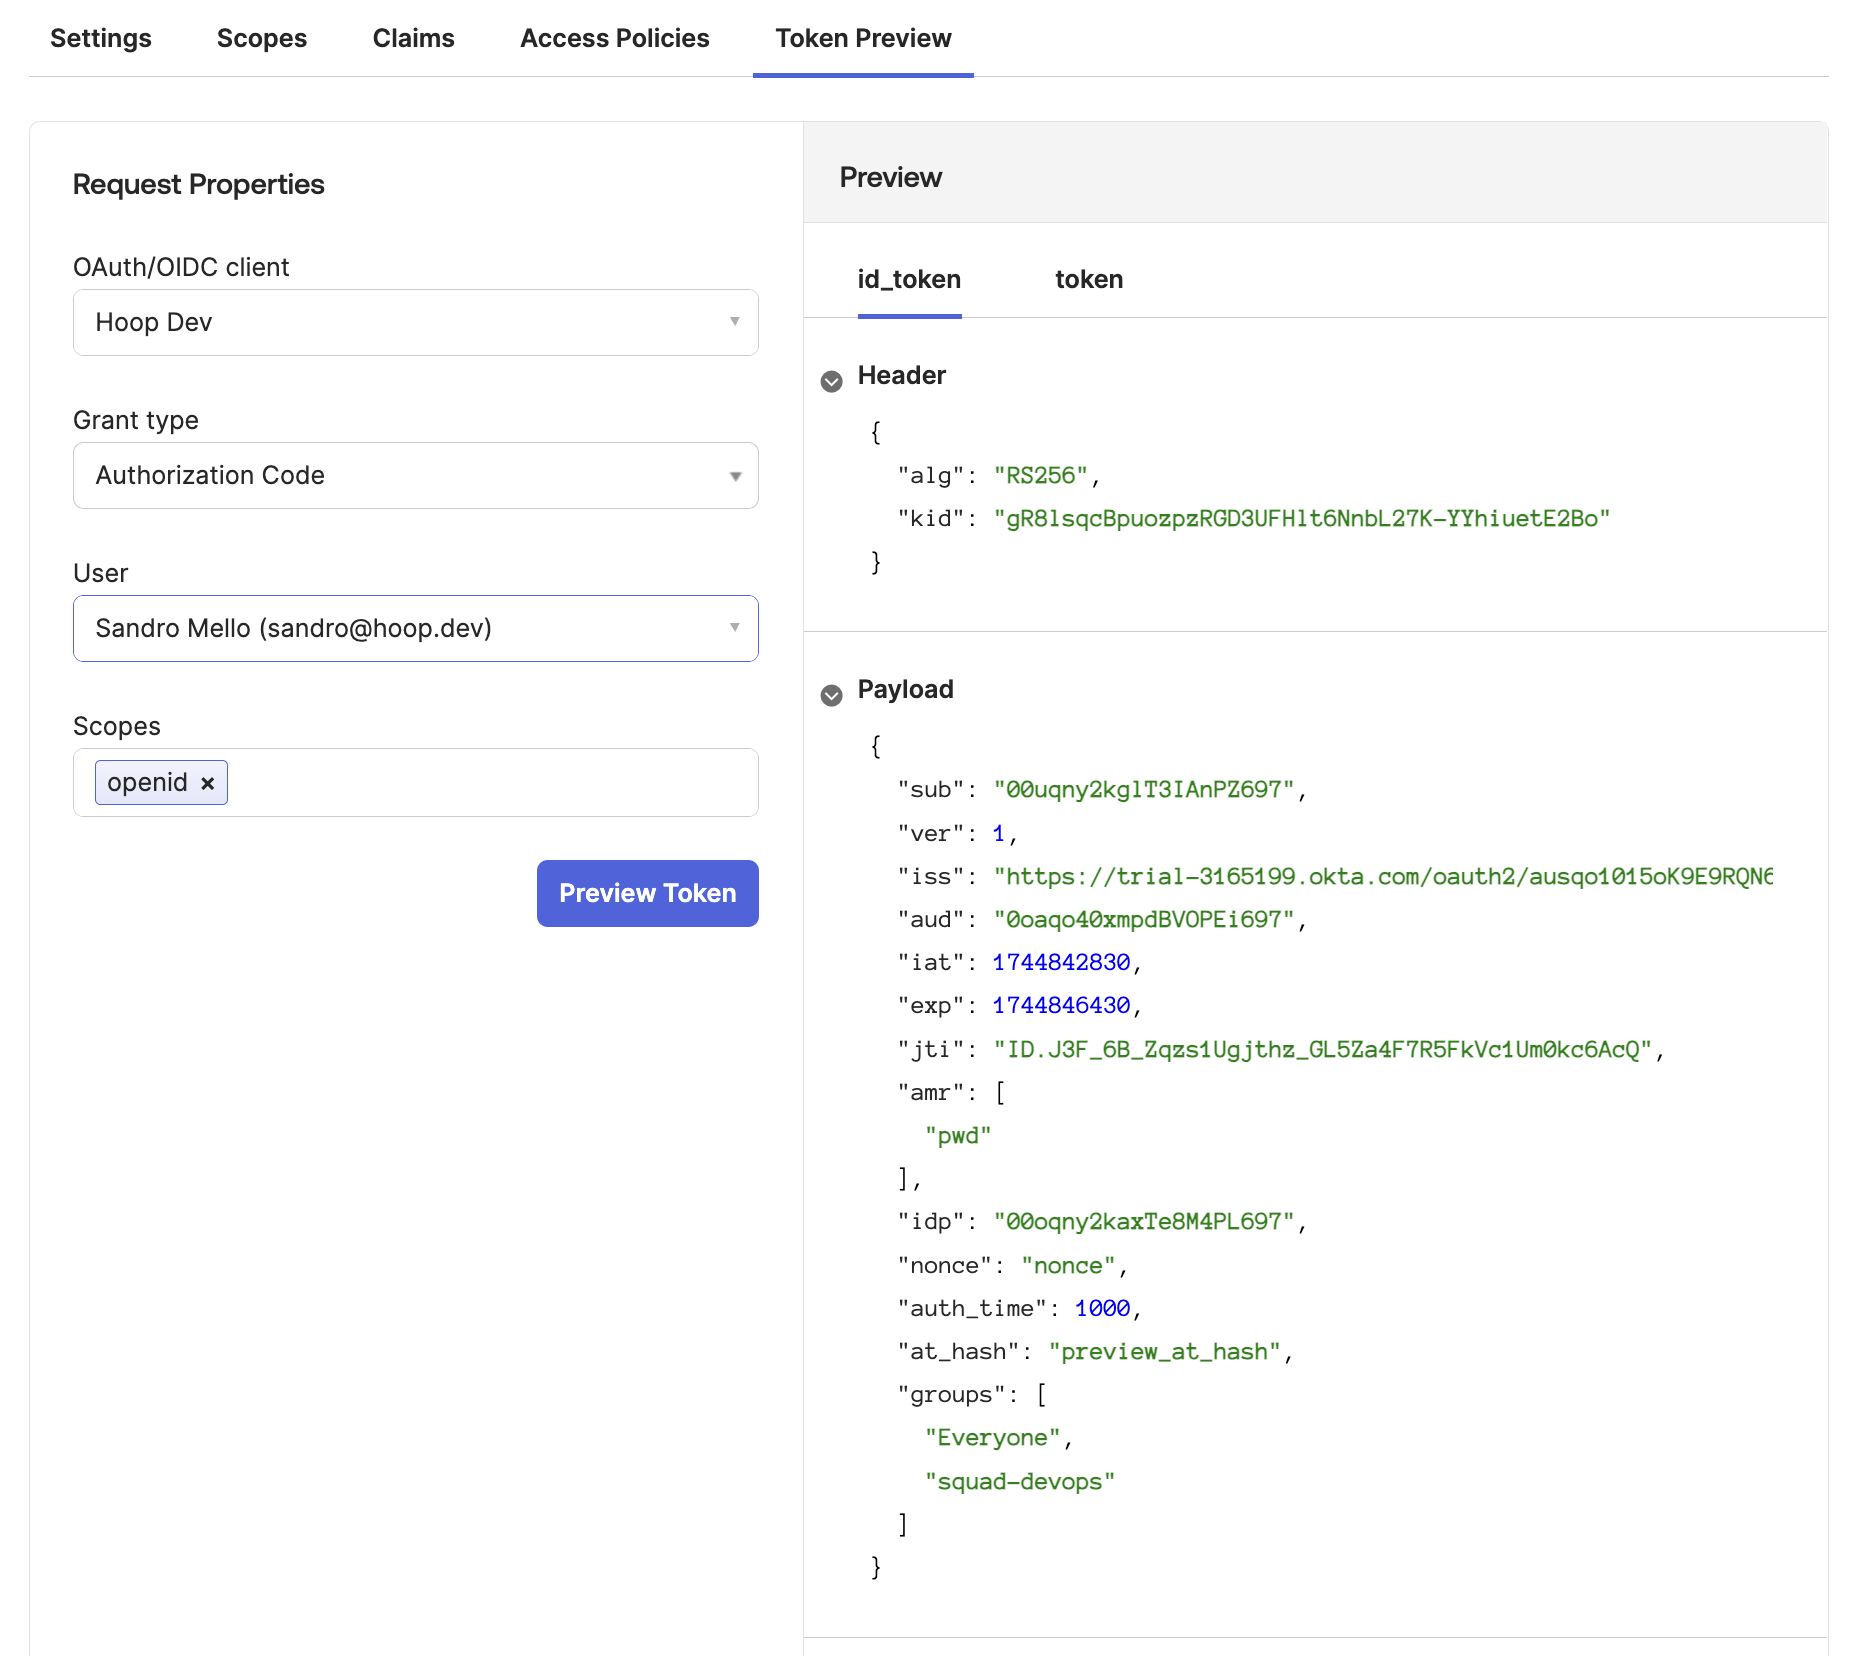
 This step validate if the configuration is returning the `groups` claim properly
* Go to `Token Preview` tab
* Select the Hoop Application
* Select the Grant Type as `Authorization Code`
* Select a user associated with this application
* Add the scope `openid`
The payload must appear with a claim named `groups` containing the groups associated with your application (image below)
This step validate if the configuration is returning the `groups` claim properly
* Go to `Token Preview` tab
* Select the Hoop Application
* Select the Grant Type as `Authorization Code`
* Select a user associated with this application
* Add the scope `openid`
The payload must appear with a claim named `groups` containing the groups associated with your application (image below)
 Please note that the `groups` claim **will not be present when a user has no group assignments**.
Hoop synchronizes group information only when this attribute is configured.
To prevent potential issues, ensure each user is assigned to at least one default group.
Ensure the **Groups Claim** field in **Integrations** > **Authentication** is set to `groups` to match the claim name configured above. This is the default value and usually requires no change.
Please note that the `groups` claim **will not be present when a user has no group assignments**.
Hoop synchronizes group information only when this attribute is configured.
To prevent potential issues, ensure each user is assigned to at least one default group.
Ensure the **Groups Claim** field in **Integrations** > **Authentication** is set to `groups` to match the claim name configured above. This is the default value and usually requires no change.