> ## Documentation Index
> Fetch the complete documentation index at: https://hoopdev-docs-improve-idp-sso-pages.mintlify.site/llms.txt
> Use this file to discover all available pages before exploring further.
# AWS Cognito
## Requirements
* An account in AWS
* `API_URL` is the public DNS name of the hoop gateway instance
Contact the administrator of the hoop gateway instance to retrieve the `API_URL` address.
Go to AWS Management Panel > AWS Cognito > User Pools > Create User Pool
* Select the checkbox User Name and Email and click Next
* In Multi Factor Authentication, change it No MFA and click Next
* In Requirement Attributes select: `name` and click Next
* On Message Delivery configure it and click Next
* Select a name for the user pool. e.g.: hoopgateway
* Select the checkbox Use the Cognito Hosted UI
* Configure the Cognito domain
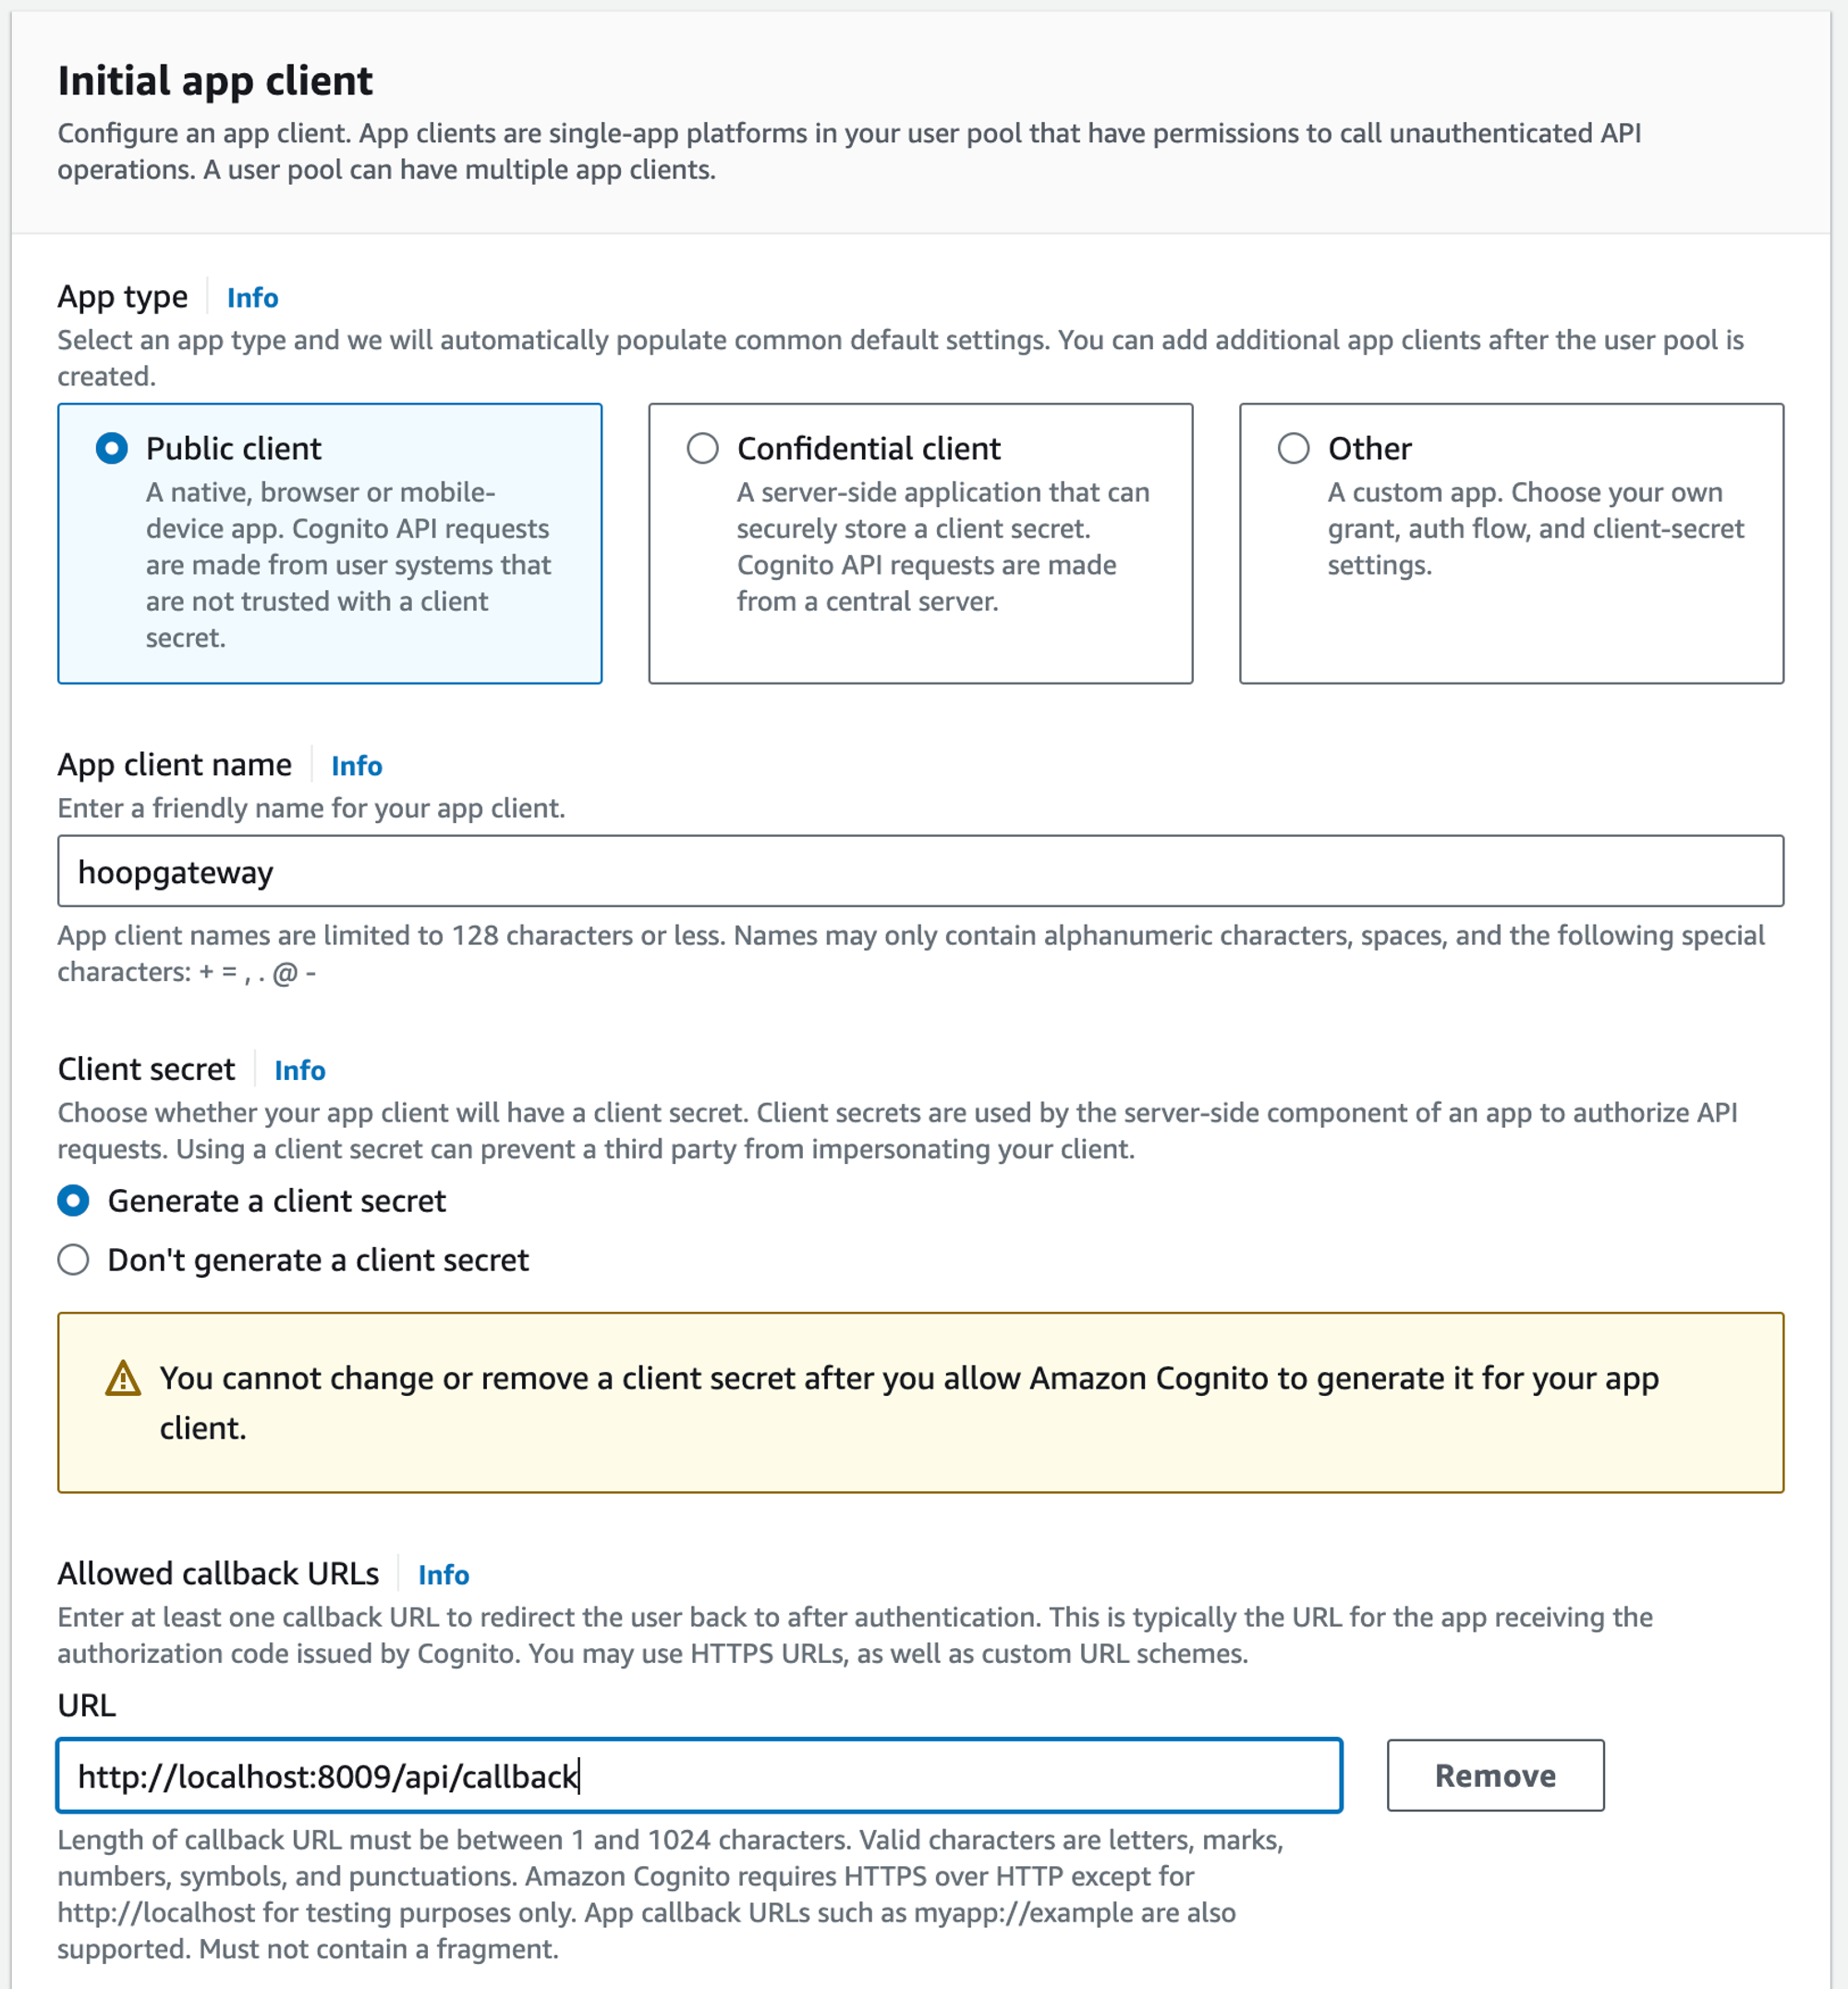
 * In Initial App Client, select Public Client and add an App client name
* Select the option Generate Client Secret
* Add the URL of the callback to `{API_URL}/api/callback`
* In Initial App Client, select Public Client and add an App client name
* Select the option Generate Client Secret
* Add the URL of the callback to `{API_URL}/api/callback`
 * In Advanced app client settings, select the checkbox ALLOW\_USER\_PASSWORD\_AUTH
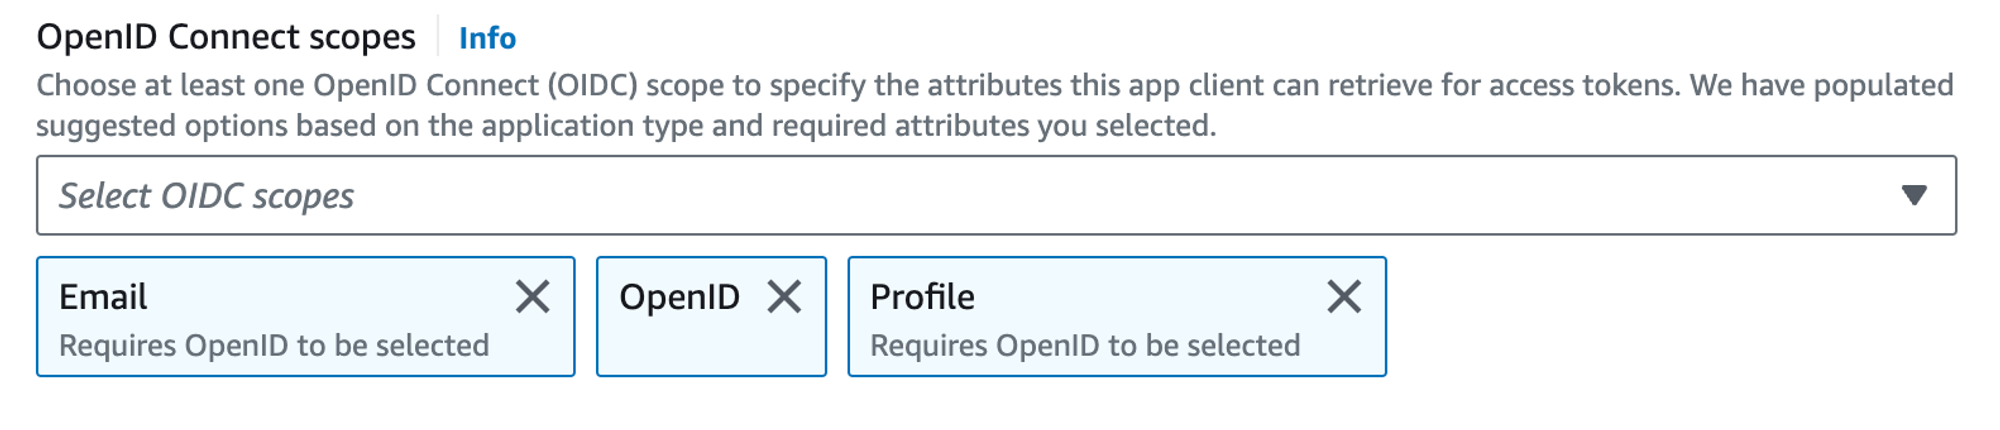
* Configure the scopes Email, OpenID and Profile
* In Advanced app client settings, select the checkbox ALLOW\_USER\_PASSWORD\_AUTH
* Configure the scopes Email, OpenID and Profile
 * Leave all the rest of options as default, click in Next and create the user pool
* Go to the created user pool
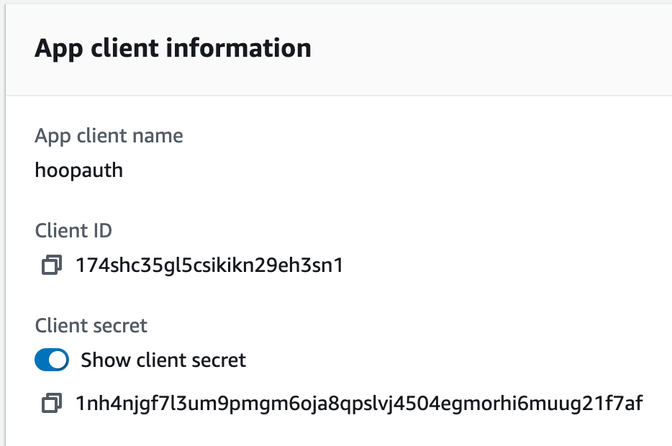
* Select the tab App Integration > Click on `hoopauth`
* Copy the Client ID and Client Secret
* Leave all the rest of options as default, click in Next and create the user pool
* Go to the created user pool
* Select the tab App Integration > Click on `hoopauth`
* Copy the Client ID and Client Secret
 The Issuer URL is composed from the user pool region and ID: `https://cognito-idp.{aws-region}.amazonaws.com/{user-pool-id}`
## Configure Hoop Gateway
Go to **Integrations** > **Authentication** and fill in:
* **Auth Method**: OIDC
* **Issuer URL**: `https://cognito-idp.{aws-region}.amazonaws.com/{user-pool-id}`
* **Client ID**: the Client ID from above
* **Client Secret**: the Client Secret from above
```sh theme={null}
curl -X PUT {API_URL}/api/serverconfig/auth \
-H "Api-Key: {API_KEY}" \
-H "Content-Type: application/json" \
-d '{
"auth_method": "oidc",
"provider_name": "aws-cognito",
"oidc_config": {
"issuer_url": "https://cognito-idp.{AWS_REGION}.amazonaws.com/{USER_POOL_ID}",
"client_id": "{CLIENT_ID}",
"client_secret": "{CLIENT_SECRET}",
"groups_claim": "groups"
},
"webapp_users_management_status": "active"
}'
```
The Issuer URL is composed from the user pool region and ID: `https://cognito-idp.{aws-region}.amazonaws.com/{user-pool-id}`
## Configure Hoop Gateway
Go to **Integrations** > **Authentication** and fill in:
* **Auth Method**: OIDC
* **Issuer URL**: `https://cognito-idp.{aws-region}.amazonaws.com/{user-pool-id}`
* **Client ID**: the Client ID from above
* **Client Secret**: the Client Secret from above
```sh theme={null}
curl -X PUT {API_URL}/api/serverconfig/auth \
-H "Api-Key: {API_KEY}" \
-H "Content-Type: application/json" \
-d '{
"auth_method": "oidc",
"provider_name": "aws-cognito",
"oidc_config": {
"issuer_url": "https://cognito-idp.{AWS_REGION}.amazonaws.com/{USER_POOL_ID}",
"client_id": "{CLIENT_ID}",
"client_secret": "{CLIENT_SECRET}",
"groups_claim": "groups"
},
"webapp_users_management_status": "active"
}'
```