> ## Documentation Index
> Fetch the complete documentation index at: https://hoopdev-docs-improve-idp-sso-pages.mintlify.site/llms.txt
> Use this file to discover all available pages before exploring further.
# Managing Access
> Learn how to control and organize access to your connections through user groups and permissions
 Hoop.dev provides a comprehensive access management system that allows administrators to control who can access specific connections. This is primarily managed through user groups and connection-specific configurations.
## Managing Users and Groups
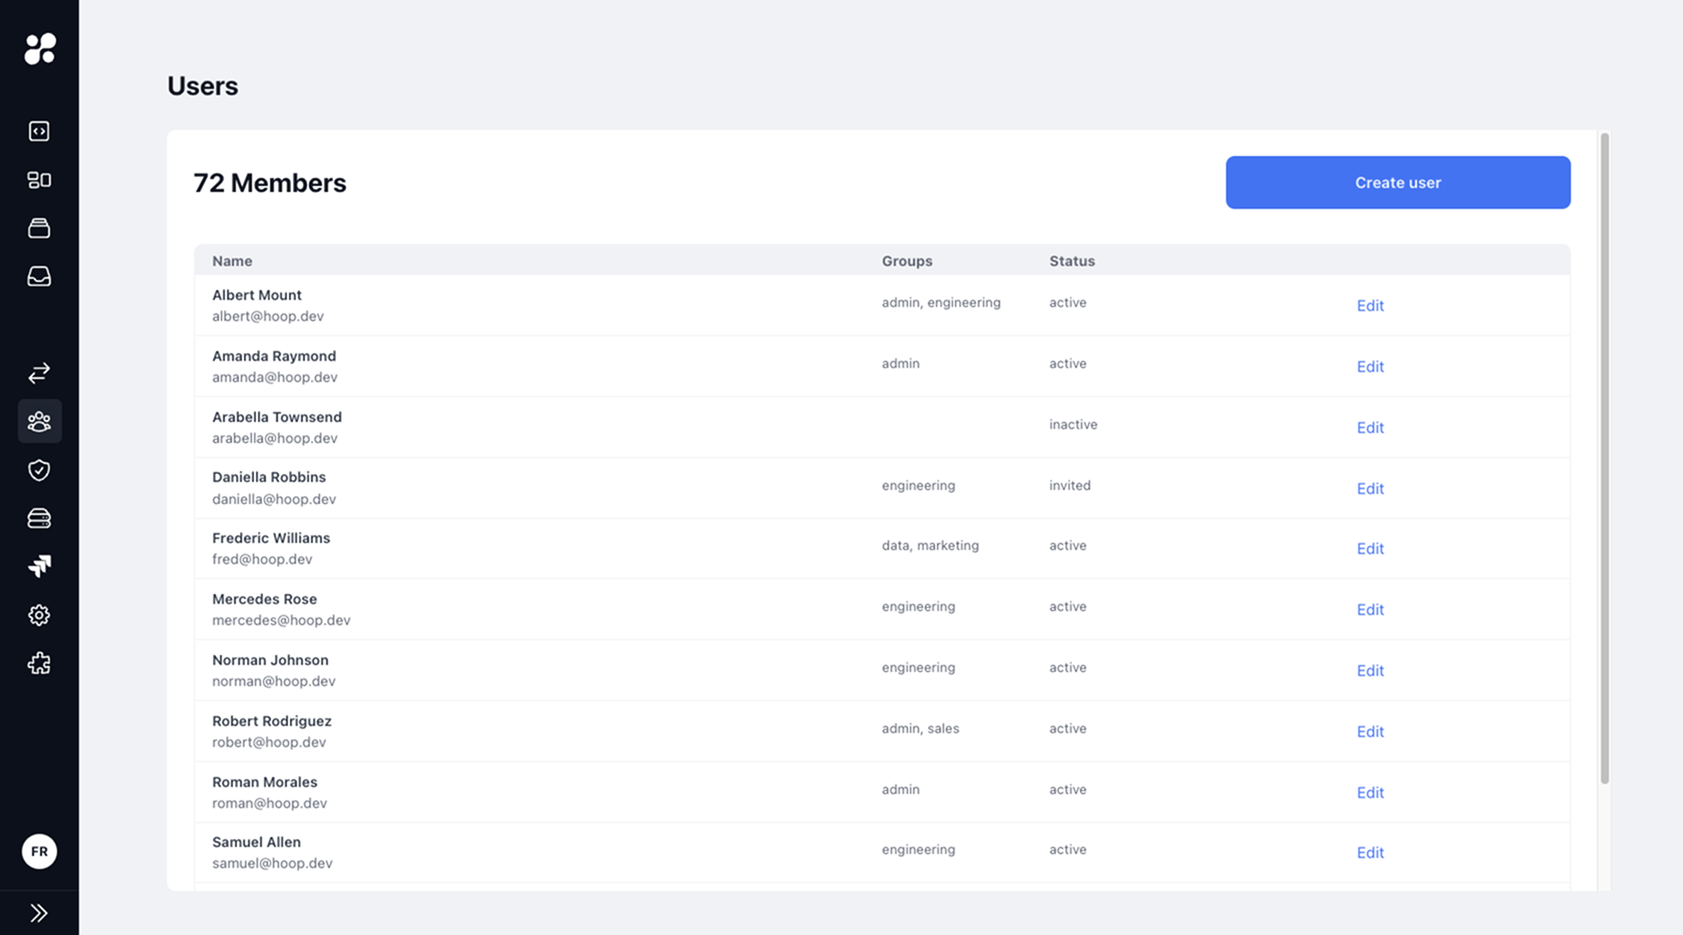
### User Management
From the sidebar, administrators can access the [Users](https://use.hoop.dev/organization/users) section to:
* View all members in the organization
* Create new users
* Manage user statuses
* Edit user details and group assignments
### Group Management
Groups are the primary way to organize users and control access:
Administrators can create groups that represent teams, roles, or access levels (e.g., engineering, sales, admin)
Users can be assigned to one or multiple groups:
* Click the **Edit** button next to a user
* Add or remove groups from the user's profile
* Save the changes
## Configuring Connection Access
Hoop.dev provides a comprehensive access management system that allows administrators to control who can access specific connections. This is primarily managed through user groups and connection-specific configurations.
## Managing Users and Groups
### User Management
From the sidebar, administrators can access the [Users](https://use.hoop.dev/organization/users) section to:
* View all members in the organization
* Create new users
* Manage user statuses
* Edit user details and group assignments
### Group Management
Groups are the primary way to organize users and control access:
Administrators can create groups that represent teams, roles, or access levels (e.g., engineering, sales, admin)
Users can be assigned to one or multiple groups:
* Click the **Edit** button next to a user
* Add or remove groups from the user's profile
* Save the changes
## Configuring Connection Access
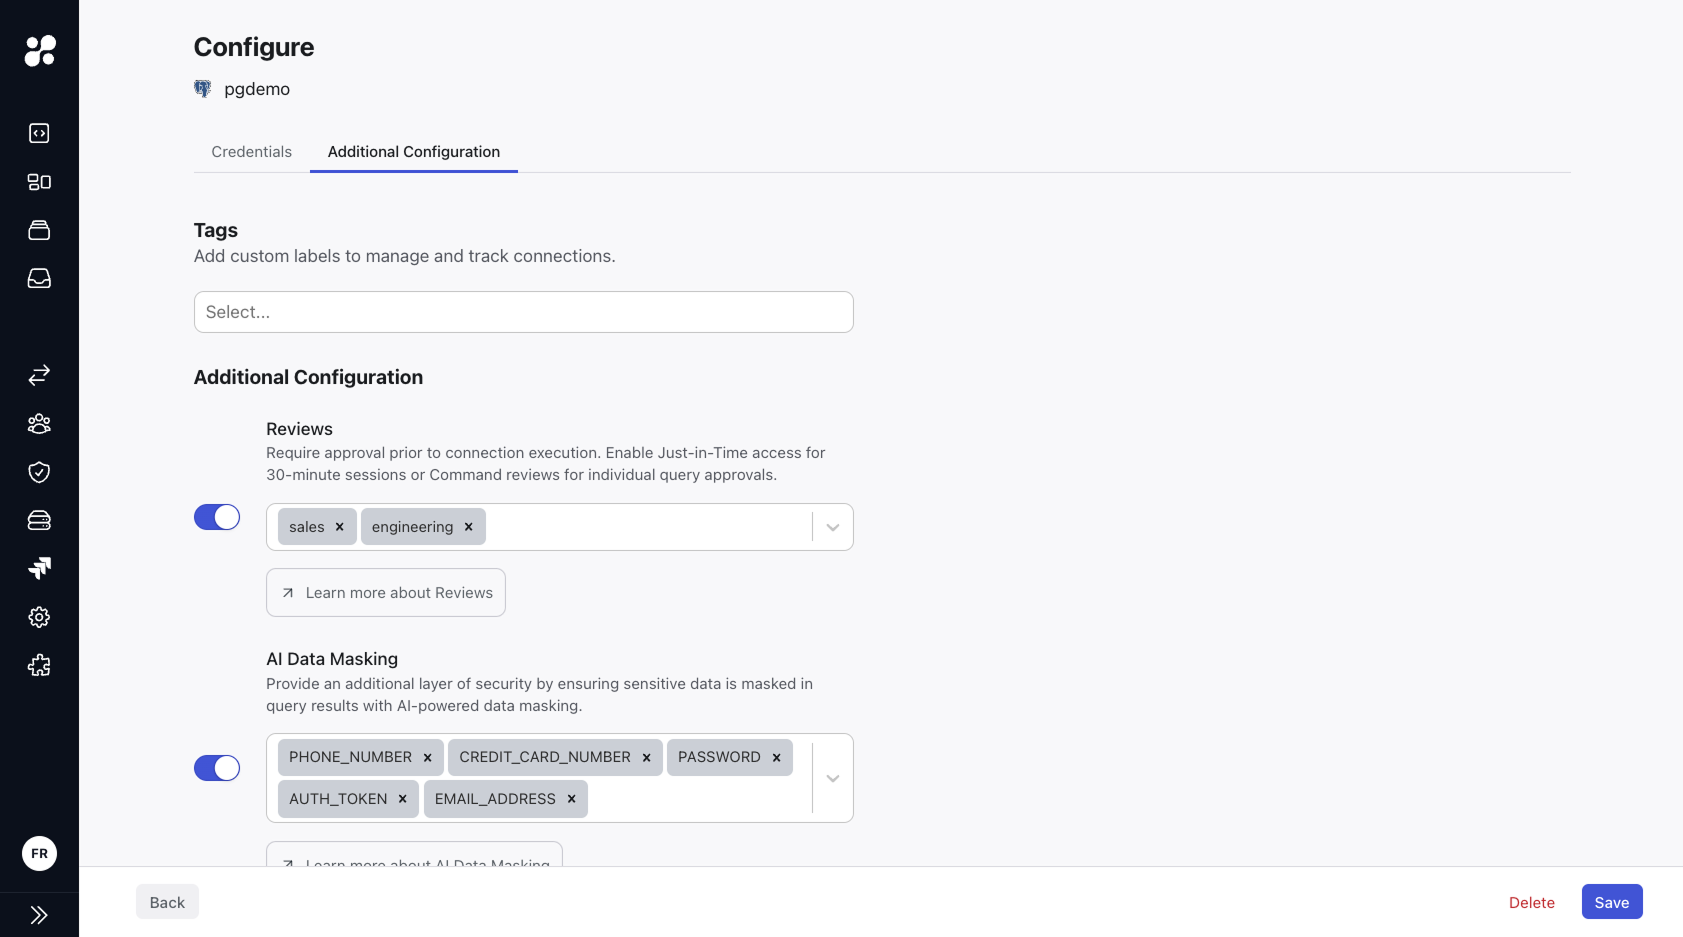 Administrators can set up access controls in the Configuration options of a connection:
### Access Requests Configuration
Enable the Access Requests toggle to require approval for connection access.
Select which groups:
* Can access the connection
* Need approval before accessing
* Can approve access requests
### Access Modes
Configure how users interact with the connection:
Create templates to automate tasks in your organization
Allow access through Command Line Interface
Enable access through the developer portal and CLI commands
## Best Practices
Grant users only the access they need for their role
Create groups based on teams and responsibilities
Periodically review group memberships and access permissions
Use session monitoring to track and audit connection usage
## Next Steps
Learn how to track and audit connection usage
Configure approval workflows for secure access
Administrators can set up access controls in the Configuration options of a connection:
### Access Requests Configuration
Enable the Access Requests toggle to require approval for connection access.
Select which groups:
* Can access the connection
* Need approval before accessing
* Can approve access requests
### Access Modes
Configure how users interact with the connection:
Create templates to automate tasks in your organization
Allow access through Command Line Interface
Enable access through the developer portal and CLI commands
## Best Practices
Grant users only the access they need for their role
Create groups based on teams and responsibilities
Periodically review group memberships and access permissions
Use session monitoring to track and audit connection usage
## Next Steps
Learn how to track and audit connection usage
Configure approval workflows for secure access